

Brush Diverter#
Assembly components#
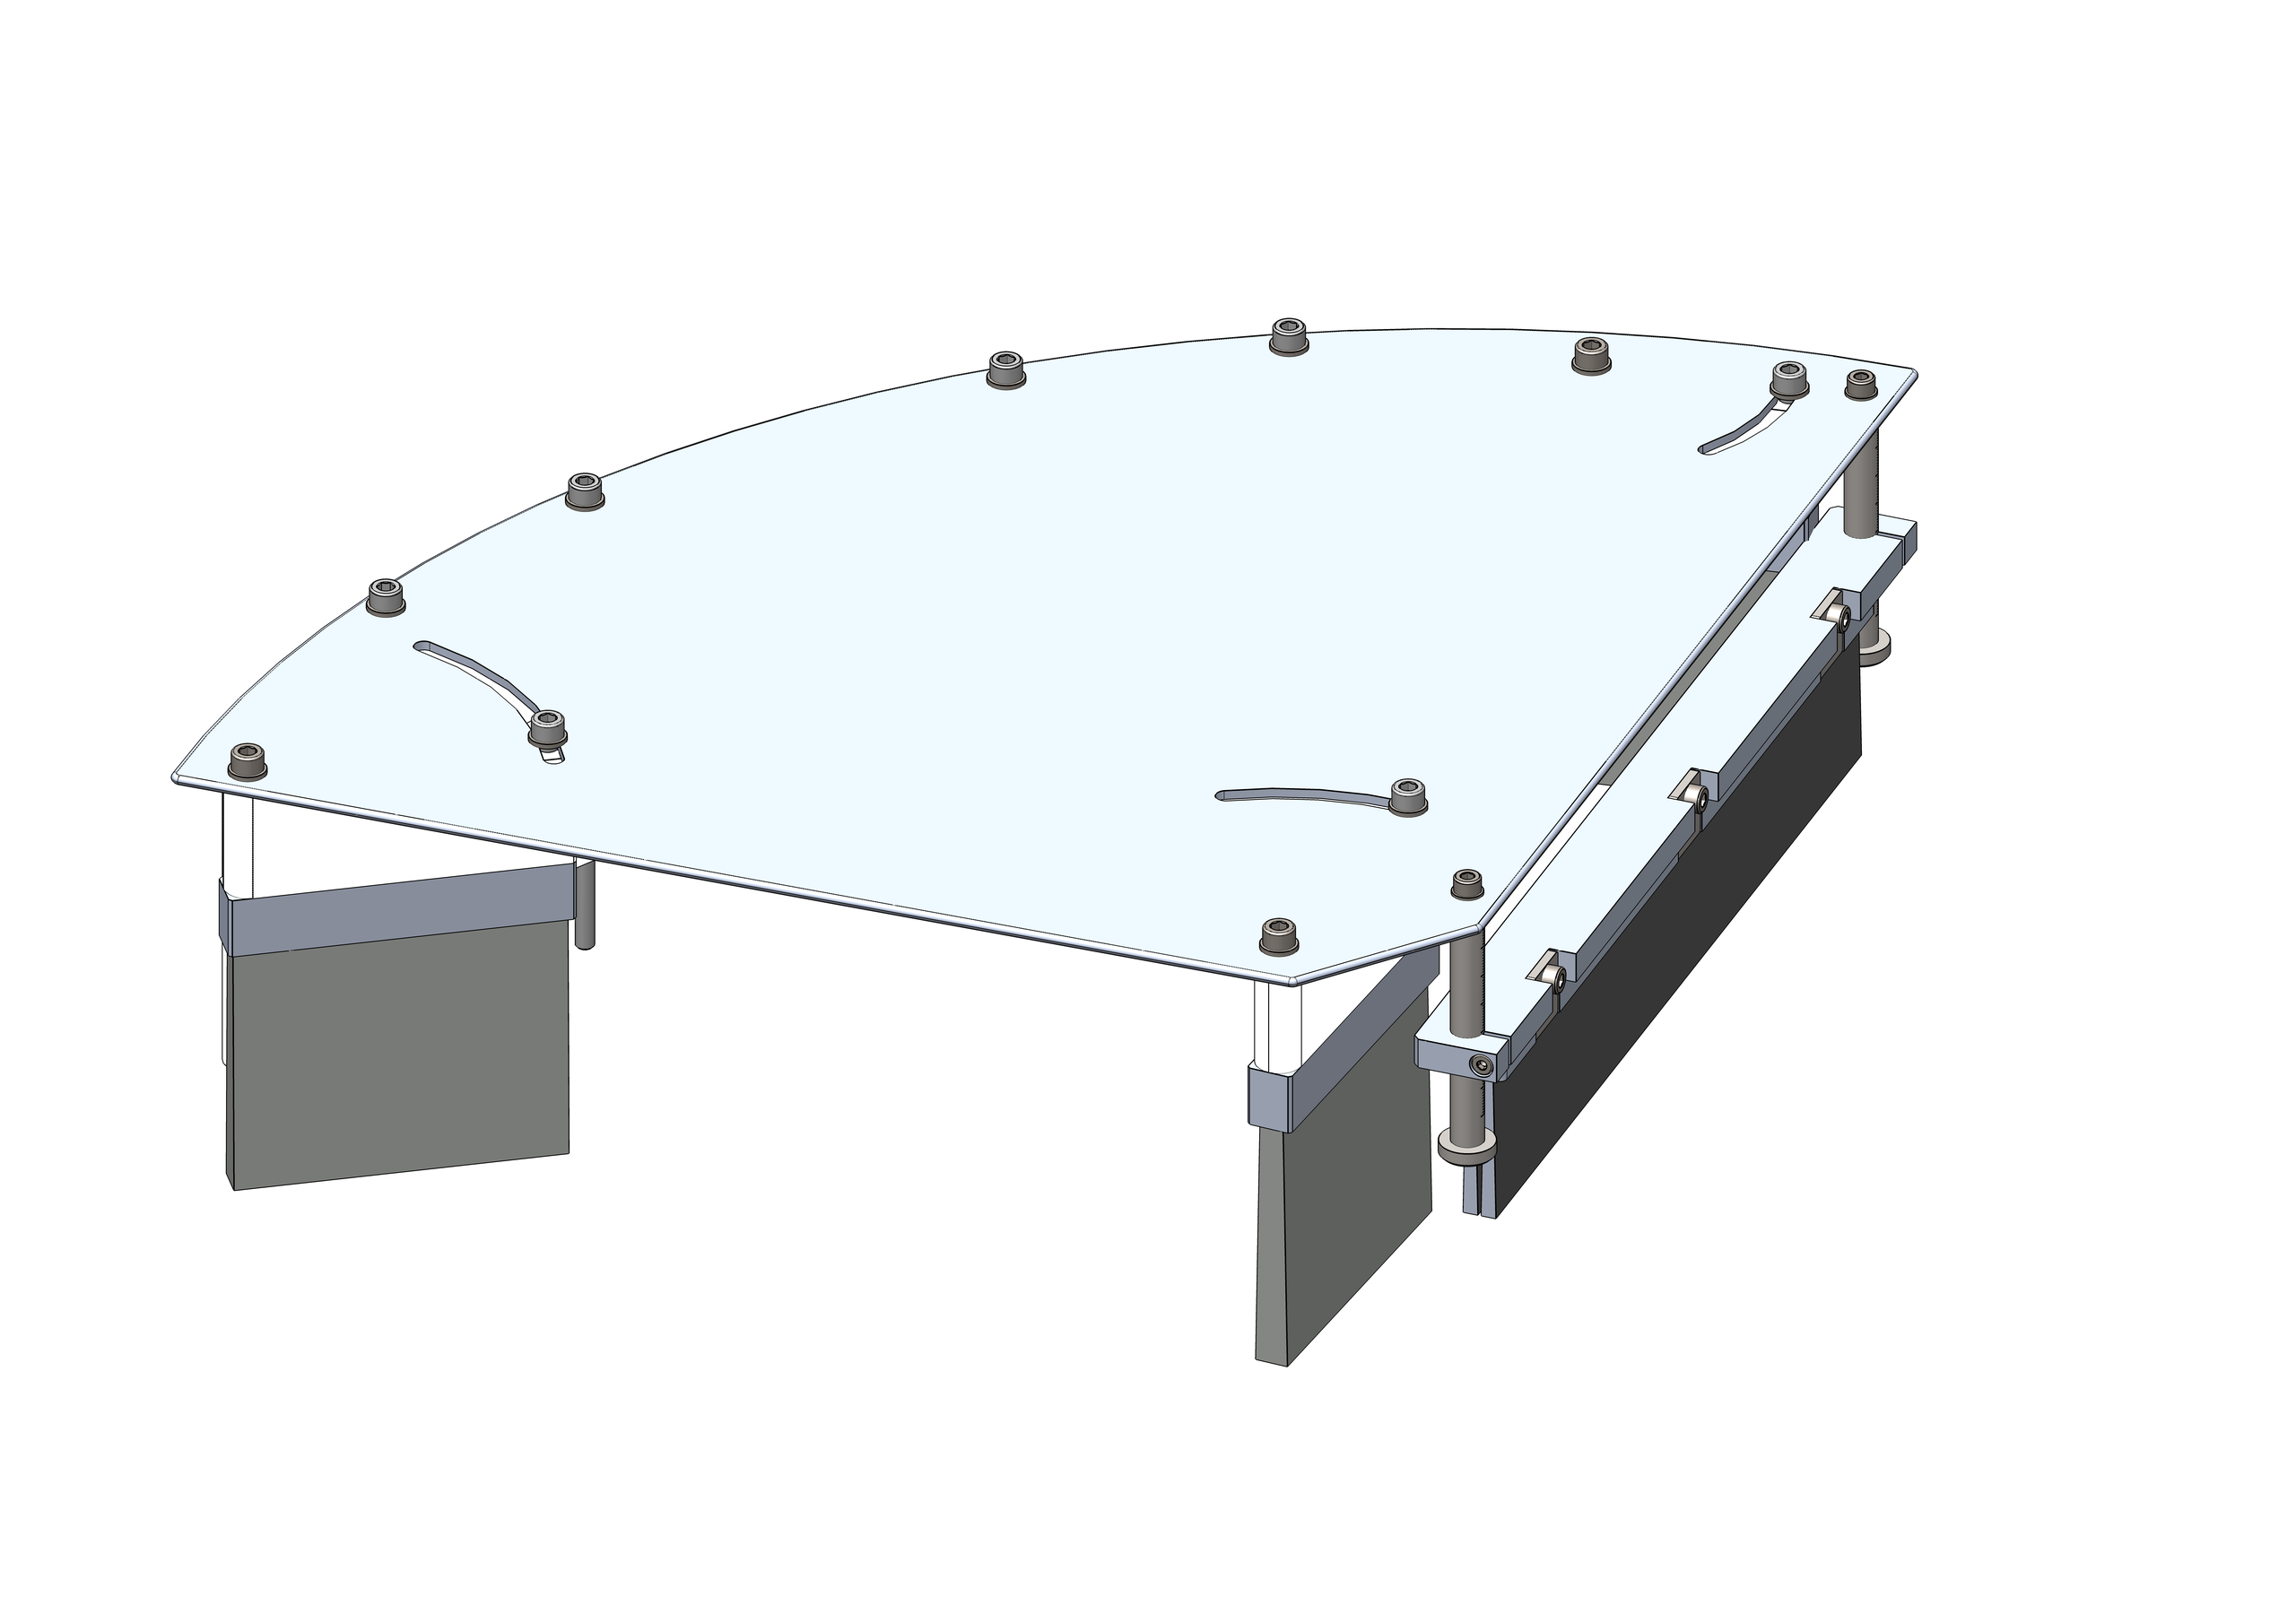
The brush diverter assembly can include up to 4 brushes:
Recommended applications#
Prefer the brush diverter assembly:
Over the blows, when the components are too heavy to be moved by the air jet;
Over the standard diverters, when spike surfaces are used.
Mounting procedure#
Warning
Warning Make sure the FlexiBowl® is switched off and stationary before proceeding with the mounting.
Step |
Operation |
|---|---|
1 |
Remove the entire flip screen-barrier assembly by unscrewing the four fixing screws |
2 |
Replace the screen with the brush diverter assembly |
3 |
Fix the new brush diverter-flip barrier assembly |
Adjustment procedure#
Warning
Warning Make sure the FlexiBowl® is switched off and stationary before proceeding with the adjustment.
Central brushes and diverters#
Step |
Operation |
|---|---|
1 |
Loosen the two fixing screws |
2 |
Use the slot to bring the brush to the desired position |
3 |
Tighten the fixing screws again |
Adjustable brush#
Step |
Operation |
|---|---|
1 |
Loosen the screws on the sides of the support |
2 |
Slide the brush along the graduated columns to the desired position |
3 |
Tighten the screws on the sides of the support |
Checking correct operation#
Run a handling test of the FlexiBowl® to evaluate the effectiveness of the diverters.
See also
For more information on accessories and alternative configurations, see:
Standard diverter manual
Guide to compatible spike surfaces
FlexiBowl® datasheet